At the main menu, use the Right Analog-stick to look down at your hand and see you are locked up. Repeatedly press L2 + R2 to escape from the chair (unlocks the "Just Ask Me Nicely" secret trophy). After breaking free, move around to the area behind your chair to find an old computer terminal you can use to access the Central Intelligence Agency Data System. Type one of the following codes to access early unlockables and hidden features in the game. Note: You can also plug a USB keyboard into your PlayStation 3 to enter the codes and play the Zork text-based adventure game.
- Mission select, "Five" Zombies mode map, Dead Ops Arcade game, and Zork game Enter "3ARC UNLOCK" as a code to unlock the "Five" Zombies mode map, Dead Ops Arcade game, Zork: The Great Underground Empire text-based adventure game, and all missions.
- All Intel Enter "3ARC INTEL" as a code to unlock all Intel. Note: Enabling this code will prevent the "Closer Analysis" trophy from being earned.
- Alicia game Enter "ALICIA" as a code to unlock the Alicia virtual therapist game.
- Dead Ops Arcade game Enter "DOA" as a code to unlock the Dead Ops Arcade game, which is a zombie killing mini-game similar to Smash TV. Use the Left Analog-stick to move and the Right Analog-stick to shoot. Note: Play the Dead Ops Arcade game to get the "Insert Coin" trophy.
- Zork game Enter "ZORK" or "HELLO SAILOR" as a code to unlock the Zork: The Great Underground Empire text-based adventure game. Note: Play the Zork game to get the "Eaten By A Grue" trophy.
- Display all commands Enter "HELP" as a code to display a list of system commands in the terminal and Pentagon user e-mail access.
- Open corresponding file Enter "CAT [filename]" or "PRINT [filename]" as a code to open the corresponding file.
- List audio files and pictures Enter "DIR" as a code to display a list of audio files and pictures for use with "CAT" command.
- List of login names Enter "WHO" as a code to display a list of login names for use with the "RLOGIN" command (requires passwords).
- Login Enter "LOGIN" as a code to login with a corresponding username and password.
- Open mail folder for current user Enter "MAIL" as a code to open the mail folder for the current user.
- Display contents of current directory Enter "DIR" or "LS" as a code to display the contents of the current directory.
- Encode a string using the CIA's cypher Enter "ENCODE" as a code to encode a string using the CIA's cypher.
- Decode a string using the CIA's cypher Enter "DECODE" as a code to decode a string using the CIA's cypher.
- Display "Fee Fie Foe Foo!" Enter "FOOBAR" as a code to display "Fee Fie Foe Foo!".
- Login as Robert Oppen: Username: "roppen", Password: "trinity"
- Login as T. Walker: Username: "twalker", Password: "thanksdad"
- Login as Vannevar Bush: Username: "vbush", Password: "majestic1"
| Person | Username | Password |
| Adrienne Smith | asmith | roxy |
| Alex Mason (default account) | amason | password |
| Bruce Harris | bharris | goskins |
| D. King | dking | mfk |
| Frank Woods | fwoods | philly |
| Grigori "Greg" Weaver | gweaver | gedeon |
| J. Turner | Jturner | condor75 |
| Jason Hudson | jhudson | bryant1950 |
| John McCone | jmccone | berkley22 |
| Joseph Bowman | jbowman | uwd |
| John F. Kennedy | jfkennedy | lancer |
| Lyndon B. Johnson | lbjohnson | ladybird |
| Richard Nixon | rnixon | checkers |
| Richard Helms | rhelms | lerosey |
| Richard Kain | rkain | sunwu |
| Ryan Jackson | rjackson | saintbridget |
| T. Walker | twalker | radi0 |
| Terrance Brooks | tbrooks | lauren |
| Vannevar Bush | vbush | manhattan |
| William Raborn | wraborn | bromlow |
In Mission 7: Numbers, after interrogating Clarke, several enemy soldiers will appear at the end of the long hallway. If you shoot all six Nova 6 canisters (two in the back, four on the sides), you can retrieve a cassette tape in the office behind where you started. Note: It is recommended that you toss a flashbang to blind the enemies so you can shoot the canisters more easily. Once you pick up the tape, continue progressing through the mission until the part where Weaver and Clarke both jump off the roof and onto a mattress. After they jump down, Clarke will ask Weaver to help him move a fridge out of the way to his first weapon stash. Once they do, go inside, and look to the left. There should be a place to put the cassette. Note: When picking up and placing the cassette tape, the game will not prompt you to do anything -- you must use this information to know when to do these things. Once you insert the cassette tape, the screen will shake, and the Thunder Gun will appear out of the wall. It has twelve bullets, and it is reloaded at checkpoints.
- Dead Ops Arcade: Play the Dead Ops Arcade game or successfully complete the game. The map description reads "Step back through time with this retro arcade zombie adventure and do battle with the forces of the Cosmic Silverback."
- Der Riese: Requires a unique code that is included with the Call Of Duty: Black Ops Hardened and Prestige Edition.
- Five: Successfully complete Campaign mode on any difficulty. The map description reads "The Pentagon is under attack! Washington is going to DEFCON 1 in this installment of "Zombies"."
- Kino Der Toten: Available at the start. The map description reads "Battle the undead in this theatrical installment of "Zombies". New twists and clues could uncover the final plan. It's show time!"
- Nacht Der Untoten: Requires a unique code that is included with the Call Of Duty: Black Ops Hardened and Prestige Edition.
- Shi No Numa: Requires a unique code that is included with the Call Of Duty: Black Ops Hardened and Prestige Edition.
- Verruckt: Requires a unique code that is included with the Call Of Duty: Black Ops Hardened and Prestige Edition.
- 1. It is on a crate inside a building after going up a hill and passing a weapon depot. It is straight ahead as you enter the building with Woods and Bowman leading the way.
2. It is on the dresser inside of a bedroom with a bed and TV in the next area you enter after you have killed the fake Castro.
3. It is on top of a ladder inside of the first hangar you enter just after you rappel down from the mountain to the airfield.
- 4. It is on top of a cabinet on the second floor of the first building you enter with Reznov just after the prisoners have taken out the tower after moving along the train yard behind cover.
5. It is on a table inside the armory with a few radios. The armory is just after Sergei dies from holding the security door open for you and the other prisoners to get through.
6. It is on the bottom shelf of a rack near the back of the building you start in after the cutscene from being gassed. There will be a pallet jack and lantern in front of it. You must grab this Intel before getting on the bike.
- None
- 7. It is on the third floor of the communications building on top of the right table that is underneath the four TV's and golden emblem. You must grab this Intel before going up the ladder to the top of the communications building.
8. It is inside the control room for the rocket. It is in the far left corner after you blow a hole in the wall on top of the computer in the corner.
9. It is inside another control room underground on top of a radar computer below the window. This is down the hall to the right after the offices.
- 10. It is on top of a bunch of ammo crates in the back area you are defending from being rushed by the enemy and when you need to destroy the three T55 tanks. You must grab this Intel before following Woods into the hole in the ground.
11. It is in the bunker at the bottom left corner of the hill. It is sitting inside the right window.
12. It is in the larger bunker you enter after saving Woods. It is on a shelf after you pass through the collapsed support beams on fire in the right corner of the same room. You must grab this Intel before following Woods and entering the vehicle.
- 13. It is on a table in the security room after you breached the room to find Reznov in it. This is also the same room with a projector and where there is a short cutscene.
14. It is on a table with a TV inside of a building down the street from when you first use the radio to call in air support and where you travel with the M113 armored vehicle.
15. It is inside of a building on a table in the corner at the end of the mission when you have to defend the landing zone. Make sure to grab this Intel before enemies start coming. It will also be right after you have to place the C4 on the above wall and then the tank on the street explodes. It is the building at the back far right corner from when you come out of the building you used the C4 in.
- 16. It is at the beginning of the level after you have interrogated Clarke. It is on a desk in the back right corner behind you. You must grab this Intel quickly so the Nova 6 gas does not kill you.
17. It is lying on the ground in front of a shack with garbage all around on the ground. This is just after you slide down the metal roofing, and the game goes into slow-motion so you can kill the enemies that appear.
18. It is lying on the metal roofing with garbage as you continue to descend after Clarke gets shot in the head while you are trying to save him. This is just before the end of the level where you slide down plywood.
- 19. It is on a table with a lantern and files in the two-story building you come across approximately halfway through the mission. There are two snowplows outside the entrance.
20. It is on a table next to a cabinet in the hangar with a rocket in it. The table is in a room in the back right corner. You will need to pass through this hangar to continue the mission.
21. It is on a pallet that is almost completely covered in snow at the end of the ship. It is right before the stairs to the right. You must grab this Intel before you use the rope to get off the ship and before time runs out.
- 22. It is lying against the wall near the west corner of the hut. It is right before you knife someone in the back and just after knifing someone in their sleep after climbing through a window with Woods.
23. It is lying on the ground inside the hut at the end of the village. It is straight ahead from where you enter the village. The Intel is in the east corner of the hut. The village is just after the river area you swim through and plant explosives.
24. It is in the left tunnel after Reznov helps you move a barrier blocking the path to the next tunnel. When you lead the way, instead of going straight, go left. It is lying on the ground against a rock on the right-hand side of this tunnel.
- 25. It is on a crate next to some barrels at the beginning of the mission. It is just before you get on the boat and after the helicopter.
26. It is right after you get off the boat. It is lying on the right side of the dirt path in front of you next to a rock as you follow your squad towards the next objective.
27. It is on a rock just below the crashed plane. When you start to descend from the wing, it is right below you before you enter the plane.
- 28. It is where you breach the barracks with your squad. It is the second time that you leave Blackbird. It is down the steps to the left on the desk as you enter the barracks.
29. It is on a bench inside of the utility room located in the communications tower. It is on the second level, which is the level you enter the door from at the far left corner and right before you head down the stairs.
30. It is on a table with explosives in front of the office that is inside of the large warehouse with explosives everywhere else. You can grab this Intel before or after entering the office. However, it is easier to get it before entering since there is not any resistance.
- 31. It is on a shelf inside the large ammunition room you enter after going through the left or right tunnel when you escape. It is on the right side of the room. You must grab this Intel before continuing and exiting the underground area with Woods.
32. It is on the table with a radio to the right of the tent when you exit the underground area. You must grab this Intel before getting in the helicopter with Woods.
33. It is right after you have freed the POWs. It is on a crate in the area to the far left just before you reach the building where Kravchenko is inside on the second floor.
- 34. It is lying on the ground next to the crate to your left as you exit the shipping container that you were hiding in. Kill the enemy in front of you, grab the Intel, then move quickly so you do not get spotted from the helicopter in the area.
35. It is on a cage with a monkey in it inside of the containment unit in the center of the room. Do not shoot the enemy inside; instead knife him. If you shoot him, the containment unit will close, making it impossible to grab the Intel located inside of it. However, if you make this mistake, simply die, and start from the last checkpoint to try again.
36. It is shortly after you have put on the gas mask when the area gets gassed with Nova 6. You will first pass through one house, and then continue up the road to reach the next checkpoint. Before you go into the next house with the checkpoint, there is a house in front of it to the right that contains the Intel. It is sitting on the cabinet with a bunch of pots.
- 37. It is on top of a vending machine in the first hallway to your left after you have broken out of the chair and stumble through the doors.
38. It is inside the trash can to the right on the left side of the wall after you exit a room that triggers a long flashback cutscene. This is right after Intel #37.
39. It is on the desk to the left inside of the first office room you come across after you have a flashback with JFK as you head down the long hallway with the rocket taking off in the background.
- 40. It is just behind the first shipping container you come across. It is lying on the ground under the door. It is right before you need to use the Valkyrie Rockets to take out the two helicopters above you.
41. It is in the second room you enter when you are inside the ship. It is under the table in front of you with a bunch of crates as you enter on the other side of it. This room is after the locker room.
42. It is in the office room at the end of the mission before you fight Dragovich. It is under the left desk with the phone. This office room is right next to the control room which is flooded on the lower level -- the room you enter just after going up the stairs.
- Level 4: Create A Class
- Level 5: Contracts
- Level 6: Clan Tag
- Level 8: Game Mode Challenges
- Level 10: Killstreaks, Killstreak Challenges, Playercard Emblems
- Level 13: Combat Record
- Level 15: Medal Challenges
- Level 16: Gun Emblems
- Level 19: Gun Tag
- Level 20: Elite Challenges
- Level 22: Camo
- Level 25: Custom Reticules
- Level 28: Custom Lenses
- Level 30: Final Challenges
- Level 31: Facepaint
- Level 50: Prestige Mode
- Prestige 1: Prestige Leaderboard, Custom Class 6
- Prestige 3: Custom Class 7
- Prestige 5: Custom Class 8
- Prestige 7: Custom Class 9
- Prestige 9: Custom Class 10
- Prestige 10: Prestige Hardcore Playlist
- Prestige 11: Additional Face Paint
- Prestige 13: Clan Tag Colors
- Prestige 14: Golden Camo
- Prestige 15: Prestige Pure Playlist
Tier 1
Lightweight
- Lightweight: Move faster
- Lightweight Pro: Move faster, and no fall damage
- Melee Kills: Get 15 melee kills.
- Escape Death: Escape death 5 times after being hurt.
- Offense Medals: Get 10 offense medals by killing enemies near their objective.
- Scavenger: Replenish ammo and lethal grenades from fallen enemies
- Scavenger Pro: Replenish ammo and lethal grenades from fallen enemies, and start with extra mags and replenish tactical grenades from fallen enemies
- Resupplies: Resupply 150 times while using Scavenger.
- Grenade Kills: Get 5 lethal grenade kills with a resupplied grenade.
- Kill Count: Get 5 kills without dying 5 times.
- Ghost: Remain hidden from enemy spy planes
- Ghost Pro: Remain hidden from enemy spy planes, and avoid targeting from aircraft, IR scopes, and Sentry Guns; no red crosshair or name when targeted
- Concealed Kills: Kill 20 enemies while they have a spy plane or Blackbird active.
- Destroy Aircraft: Destroy 30 aircraft with any non-killstreak launcher.
- Destroy Sentry Gun: Destroy 1 Sentry Gun.
- Flak Jacket: Take less explosive damage
- Flak Jacket Pro: Take less explosive damage, and deflect fire damage and safely toss back frag grenades
- Protected: Survive 10 explosions while using Flack Jacket.
- Demolished: Plant or defuse 10 bombs in Demolition, Sabotage, or Search & Destroy.
- Throwbacks: Throw back 5 enemy frag grenades.
- Hardline: Get killstreak rewards with one less kill
- Hardline Pro: Get killstreak rewards with one less kill, and change the contents of a care package
- Share Packages: Share 10 Killstreak reward crates with teammates.
- Multiple Killstreaks: Get 7 killstreaks in one match while using Hardline.
- Killstreak: Get 7 kills without dying in one match.
Hardened
- Hardened: Penetrate walls and objects with deeper bullet impact
- Hardened Pro: Penetrate walls and objects with deeper bullet impact, and inflict extra bullet damage on aircraft and turrets, and flinch less when shot
- Penetration Kills: Get 10 kills using Hardened and shooting through walls.
- Bullets in Aircraft: Shoot 200 bullets into enemy aircraft.
- Equipment Shot: Destroy 1 piece of enemy equipment through a wall.
- Scout: Hold breath longer when scoped
- Scout Pro: Hold breath longer when scoped, and switch weapons faster
- Secondary Kills: Get 50 kills with secondary weapons.
- One Shot Kills: Get 50 "One Shot, One Kill" medals.
- Headshots: Get 30 headshot kills.
- Steady Aim: Maintain increased accuracy when firing from the hip
- Steady Aim Pro: Maintain increased accuracy when firing from the hip, and aim faster after sprinting, and recover quickly from knife lunges
- Quick Melee: Melee two enemies consecutively within 5 seconds.
- Sprint Kills: Get 100 kills after sprinting.
- Hip Fire Kills: Get 150 hip fire kills using Steady Aim.
- Sleight Of Hand: Reload weapons faster
- Sleight Of Hand Pro: Reload weapons faster, and aim down sights faster with all weapons, except sniper rifles
- Aiming Kills: Get 150 kills while aiming down sights.
- Reload Kills: Kill an enemy within 5 seconds of reloading 30 times.
- Fast Hand Kills: Reload and finish off the enemy you wounded 10 times.
- Warlord: Equip two attachments to your primary weapon (excluding underbarrels)
- Warlord Pro: Equip two attachments to your primary weapon (excluding underbarrels), and start with one extra tactical and lethal grenade, except Willy Pete
- Two Attachment Kills: Get 150 kills using a gun with two attachments.
- Grenade Kills: Get 10 Frag or Semtex kills.
- Grenade Multi-kills: Get 1 multi-kill with Frag or Semtex.
Tactical Mask
- Tactical Mask: Protect yourself against Nova Gas
- Tactical Mask Pro: Protect yourself against Nova Gas, and reduce the effects of Flash and Concussion grenades, and reveal the position of a flashed or stunned enemy
- Flash Kills: Kill 20 enemies that are blinded by your Flashbang grenade.
- Concussion Kills: Kill 20 enemies that are stunned by your Concussion grenade.
- Nova Gas Kills: Kill 20 enemies poisoned by your Nova Gas.
- Marathon: Sprint for a longer duration
- Marathon Pro: Sprint for a longer duration, and sprint for an unlimited duration
- 26 Miles: Sprint 26 miles using Marathon.
- First Blood: Get the "First Blood" medal 10 times.
- Captures: In Capture The Flag, get the "Flag Capture" medal 15 times while using Marathon.
- Ninja: Move silently
- Ninja Pro: Move silently, and make no noise at all and hear enemies louder
- Silenced Kills: Get 150 kills using the Suppressor attachment.
- Back Stabs: Get 5 "Backstabber" medals.
- Plants: Plant the bomb 10 times in Demolition, Sabotage, or Search & Destroy.
- Second Chance: Pull out your pistol before dying
- Second Chance Pro: Pull out your pistol before dying, and survive longer and get revived by your teammates
- Kills: Get 10 kills while in Second Chance.
- Revenge: While in Second Chance, kill the enemy who downed you 5 times.
- Headshot: Get 1 headshot kill while in Second Chance.
- Hacker: Detect enemy equipment, explosives, and turrets
- Hacker Pro: Detect enemy equipment, explosives, and turrets, and sabotage enemy equipment and turrets, and booby trap stolen crates, and remain invisible to motion sensors
- Destroys: Destroy 10 equipment or explosives while using Hacker.
- Explosive Kills: Kill 25 enemies with a Claymore or C4.
- Near Equipment Kills: Kill 25 enemies within the radius of your Jammer or Motion Sensor.
- RC-XD: 3 kills (remote control car strapped with explosives)
- Spy Plane: 3 kills (shows enemies on the mini-map; can be shot down)
- Counter Spy Plane: 4 kills (temporarily disables enemy mini-map)
- SAM Turret: 4 kills (airdrop a placeable SAM turret to destroy enemy aircraft)
- Care Package: 5 kills (airdrop a random killstreak or ammo crate)
- Napalm Strike: 5 kills (aircraft covers an area in Napalm)
- Mortar Team: 6 kills (target three locations to bombard with Mortar Strikes)
- Sentry Gun: 6 kills (airdrop a placeable Sentry Gun)
- Attack Helicopter: 7 kills (call in support helicopter)
- Valkyrie Rockets: 7 kills (launcher with remote controlled rockets)
- Blackbird: 8 kills (shows both enemy position and direction on the mini-map; cannot be shot down)
- Rolling Thunder: 8 kills (carpet bombing airstrike)
- Chopper Gunner: 9 kills (be the gunner of an attack helicopter)
- Attack Dogs: 11 kills (attack dogs that hunt down the enemy)
- Gunship: 11 kills (pilot an attack helicopter)
Assault rifles
- AUG = AUG-50M3
- Commando = Predator
- Famas = G16-GL35
- FN FAL = EPC WN
- G11 = G115 Generator
- Galil = Lemantation
- M14 = Mnesia
- M16 = SkullCrusher
- CZ75 = Calamity
- CZ75 Dual Wield = Calamity & Jane
- M1911 = Mustang & Sally
- Python = Cobra
- China Lake = China Beach
- M72 LAW = M72 Anarchy
- HK21 = H115 Oscillator
- RPK = R115 Resonator
- HS10 = Typhoid & Mary
- Olympia = Hades
- SPAZ-12 = SPAZ-24
- Stakeout = Raid
- Dragunov = D115 Disassembler
- L96A1 = L115 Isolator
- AK47u = AK74fu2
- MP40 = The Afterburner
- MPK5 = MP115 Kollider
- MPL = MPL-LF
- PM63 = Tokyo & Rose
- Ballistic Knife = The Krause Refibrillator
- Crossbow = Awful Lawton
- Ray Gun = Porter's X2 Ray Gun
- Thundergun = Zeus Cannon
- Winter's Fury = Winter's Fury
Assault rifles
- AK-47
- AUG
- Commando
- Enfield
- FAMAS
- FN FAL
- G11
- Galil
- M14
- M16
- .357 Magnum Python
- ASP
- CZ75
- M1911
- Makarov
- China Lake
- Flamethrower
- M202A1 "Grim Reaper" (Care Package only)
- M72 LAW
- RPG-7
- Strela
- Death Machine (Care Package only)
- HK-21
- M60
- RPK
- Stoner 63
- HS-10
- Ithica 37
- KS-23
- Model 1887
- Olympia/Double Barrel
- SPAS-12
- Stakeout
- Dragunov
- L96AW
- PSG1
- WA2000
- AK74u
- Kilparis
- MAC11
- MP5K
- MPL
- PM63
- Skorpion
- Spectre M4
- Uzi
- Ballistic Knife
- Crossbow
- Flashlight
- Machete
- Explosive tipped crossbow bolts
- Incendiary "Dragon’s Breath" shotgun rounds
- ACOG (750 CP)
- Dual Mag (500 CP)
- Extended Mags (500 CP)
- Flamethrower
- Grenade Launcher (1,000 CP)
- Infrared Scope (1,000 CP)
- Masterkey (750 CP)
- Red Dot Sight (750 CP)
- Reflex (750 CP)
- Suppressor
- ACOG (750 CP)
- Dual Wield
- Snub Nose (750 CP)
- Speed Reloader (750 CP)
- Upgraded Iron Sights
- C4 (2,000 CP)
- Camera Spike (2,000 CP)
- Claymore (3,000 CP)
- Jammer (2,500 CP)
- Motion Sensor (3,000 CP)
- Tactical Insertion (2,500 CP)
- Frag Grenade
- Semtex
- Tomahawk
- Concussion
- Decoy (attracts attention and creates blips on enemy radar)
- Flashbang
- Nova Gas
- Willy Pete/Smoke Grenade
- Berlin
- Dusty
- ERDL
- Flora
- Gold
- Ice
- Nevada
- Olive
- Red
- Sahara
- Siberia
- Tiger
- Warsaw
- Woodland
- Yukon
- Animal
- Apache
- Banshee
- Black Widow
- Blitz
- Clean
- Commando
- Death
- Demon
- Dragon
- Dutch
- Highlander
- Jester
- Lion
- Mantis
- Militia
- Ranger
- Reaper
- Sandman
- Sidewinder
- Smoke
- Spider
- Stalker
- Tundra
- Zulu
- Arrows horizontal
- Arrows vertical
- Arrows with dot
- Boxes
- Burst
- Circle
- Circle with arrows
- Circle with crosshairs
- Circle with dot
- Circle with inner line
- Circle with outer line
- Circle with triangles
- Circle within a circle
- Diamond
- Diamond outline
- Dot
- Heart
- Large crosshairs
- Line with dot
- Outer crosshairs
- Outer triangles
- Radiation
- Semicircle
- Skull
- Small crosshairs
- Smiley
- Square
- Square outline
- Star
- Three dots
- Treyarch
- Triangle
- X
- X with dot
- Yin yang
- 1. Python with multiple attachments
- 2. Duel Makarovs
- 3. Spas-12
- 4. Stakeout
- 5. MP5K
- 6. Duel Skorpions
- 7. AK74u
- 8. M14
- 9. M16
- 10. Famas
- 11. AUG
- 12. HK-21
- 13. M60
- 14. L96A1
- 15. WA2000
- 16. RPG
- 17. M72 Law
- 18. China Lake
- 19. Crossbow
- 20. Ballistic Knife
In Multiplayer mode, have five friends cram together, and then throw a frag grenade to kill them all and get the "Frag Master" trophy.
In Zombies mode with at least two players, blow the legs off five zombies, and then have another player stand in one place while the zombies crawl towards them. When they are all attacking the other play, throw a frag grenade to kill them all and get the "Frag Master" trophy.
- Sacrifice (Bronze): Ensure your squad escapes safely from Cuba.
- Death to Dictators (Bronze): Use a single round to bring down Castro.
- Give me liberty, or give me death (Bronze): Escape Vorkuta.
- Slingshot Kid (Bronze): Destroy all slingshot targets in 3 attempts.
- VIP (Bronze): Receive orders from Lancer.
- A safer place (Bronze): Sabotage the Soviet space program.
- Tough Economy (Bronze): Use no more than 6 TOW guided missiles to destroy the tanks in the defense of Khe Sanh.
- Looks don't count (Bronze): Break the siege in the battle of Khe Sanh.
- SOG Rules (Bronze): Retrieve the dossier and the defector from Hue City.
- Raining Pain (Bronze): Rack up a bodycount of 20 NVA using air support in Hue City.
- The Dragon Within (Bronze): Kill 10 NVA with Dragon's Breath rounds.
- Heavy Hand (Bronze): Use the Grim Reaper to destroy the MG emplacement.
- Up close and personal (Bronze): Silently take out 3 VC.
- Double Trouble (Bronze): Use only dual wield weapons to escape Kowloon.
- Broken English (Bronze): Escape Kowloon.
- Never get off the boat (Bronze): Find the Soviet connection in Laos.
- Russian Bar-B-Q (Bronze): Incinerate 10 enemies with the flamethrower attachment in the POW compound.
- Some wounds never heal (Bronze): Escape the past.
- I hate monkeys (Bronze): Kill 7 monkeys in under 10 seconds in the Rebirth labs.
- Clarity (Bronze): Crack the code.
- Double Whammy (Bronze): Destroy both helicopters with one TOW guided missile from the deck of the ship.
- Frag Master (Bronze): Kill 5 enemies with a single frag grenade.
- Sally Likes Blood (Bronze): Demonstrate killer economic sensibilities by taking down 3 enemies with a single bullet.
- Unconventional Warfare (Bronze): Use the explosive bolts to kill 30 enemies.
- Closer Analysis (Bronze): Find all the hidden intel.
- Matinee (Bronze): Watch a film clip with a friend.
- Gamblin' Fool (Bronze): Finish 5 Wager Matches 'in the money'.
- You can do it (Bronze): Reach rank 10 in Basic Training.
- The Collector (Bronze): In Zombies mode, buy every weapon off the walls in a single game.
- Hands Off the Merchandise (Bronze): Kill the Pentagon thief before it can steal your load-out.
- Sacrificial Lamb (Bronze): Kill 6 zombies after getting shot by a Pack-a-Punched Crossbow bolt.
- "Insert Coin" (Bronze): Access the terminal and battle the forces of the Cosmic Silverback in Dead Ops Arcade.
- Easy Rhino (Bronze): In Dead Ops Arcade, use a Speed Boost to blast through 20 or more enemies at one time.
- Vehicular Slaughter (Silver): Destroy all enemies on vehicles during the prison break.
- Lord Nelson (Silver): Destroy all targets and structures while making your way up the river.
- Pathfinder (Silver): Guide the squad through the Soviet ourpost without them getting killed.
- Mr. Black OP (Silver): Enter the Soviet relay station undetected.
- With extreme prejudice (Silver): Get to the POW compound in the Hind using only rockets.
- Light Foot (Silver): Escape the ship with 2:15 left on the timer in Veteran.
- No Leaks (Silver): Make it through the NOVA 6 gas without dying on Rebirth Island.
- Stand Down (Silver): Complete the campaign on any difficulty.
- Down and Dirty (Silver): Complete 'SOG' and 'The Defector' on Veteran difficulty.
- It's your funeral (Silver): Complete 'Numbers', 'Project Nova' and 'Victor Charlie' on Veteran difficulty.
- Cold Warrior (Silver): Complete 'Operation 40', 'Vorkuta' and 'Executive Order' on Veteran difficulty.
- Not Today (Silver): Complete 'Crash Site', 'WMD' and 'Payback' on Veteran difficulty.
- Burn Notice (Silver): Complete 'Rebirth' and 'Redemption' on Veteran difficulty.
- Black Op Master (Gold): Complete the campaign on Hardened or Veteran difficulty.
- Platinum Trophy (Platinum): Unlock all other trophies.
- See Me, Stab Me, Heal Me (Bronze): Fire a Pack-a-Punched Ballistic Knife at a downed ally to revive them from a distance.
- Just ask me nicely (Bronze): Break free from the torture chair.
- Eaten by a Grue (Bronze): Play Zork on the terminal.
- Chimp on the Barbie (Bronze): In Ascension, kill a space monkey with a fire trap.
- Space Race (Silver): In Ascension, pack-a-punch a weapon before round 8.
- The Eagle Has Landers (Bronze): In Ascension, escape on all 3 lunar landers.
- They Are Going THROUGH! (Bronze): In Ascension, kill at least 5 zombies with 1 gersh device.
- Stand-In (Bronze): In Call of the Dead, send the crew to Paradise in solo or co-op.
- Ensemble Cast (Silver): In Call of the Dead, send the crew to Paradise in co-op.
- Stuntman (Bronze): In Call of the Dead, make a zombie explode using the V-R11.
- Shooting on Location (Bronze): In Call of the Dead, kill 10 zombies with one Scavenger shot from over 100 feet away.
- Quiet on the Set (Bronze): In Call of the Dead, cut the lights on the Director.
- Time Travel Will Tell (Silver): In Shangri-La, acquire the focusing stone.
- Blinded By the Fright (Bronze): In Shangri-La, kill a Shrieker zombie while blinded by it.
- Zomb Disposal (Bronze): In Shangri-La, dispose of a Napalm zombie without it harming any players.
- Monkey See, Monkey Don't (Bronze): In Shangri-La, get something from the monkeys.
- Small Consolation (Bronze): In Shangri-La, use the 31-79 JGb215 on each type of zombie.


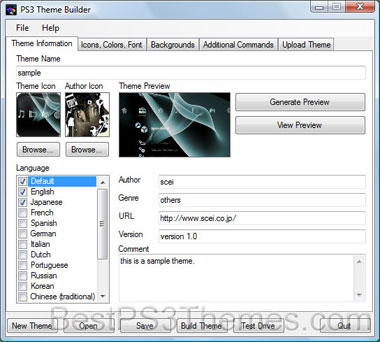
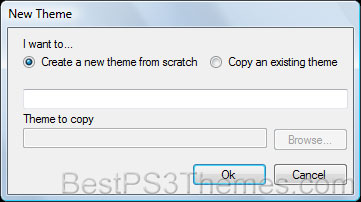
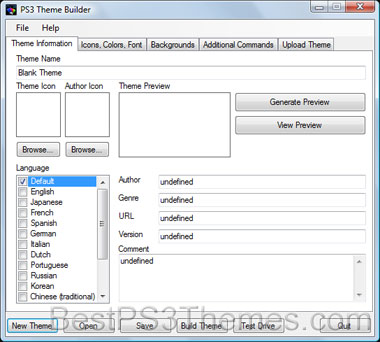
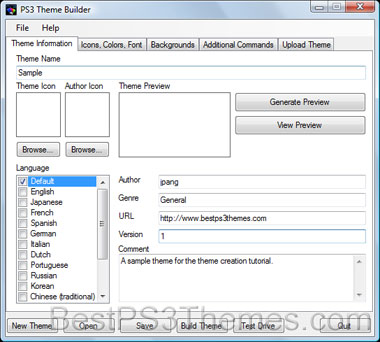


 (Settings) >
  (Theme Settings) > [Theme], and then select [Install].


